The only inground trampoline featuring vented safety pads & jumpmat for unrivalled performance.

NORTH INGROUND TRAMPOLINE
Easter Promotion


NORTH INGROUND TRAMPOLINE + Safety Net
The most advanced in ground trampoline
£1,315
From £1,030
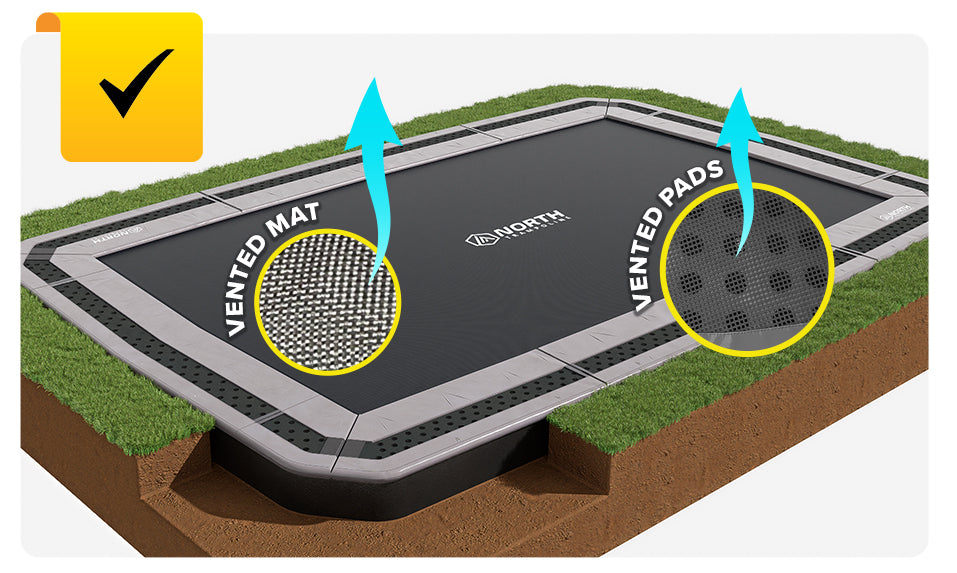
DOUBLE-VENTED
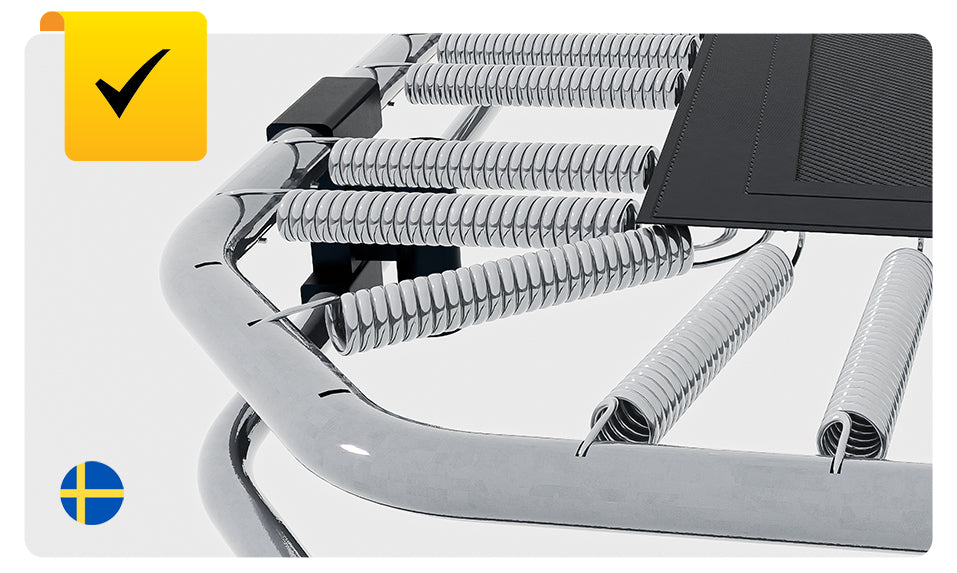
SWEDISH QUALITY
Designed by our master engineers in Sweden. Top quality robust dual frame and exclusive safety features.
EASY INSTALLATION
Designed for DIY installation. Anyone can do it!
Use our step by step guides and videos.

Watch our installation video
North In-ground Trampoline Kits have been designed for ease-of-assembly and DIY install. Over 80% of our customers do the assembly and installation themselves, or with the assistance of family and friends.
Many customers also use local gardening or landscape companies or just employ some local muscle to assist with the digging of the hole.
if you're using a landscaper send them the link to this page so they can watch the explainer video or print off the fully downloadable instructions below.
HOLE DIMENSIONS
| Trampoline size / outer hole diameter | Inner hole diameter | Minimum Hole depth |
|---|---|---|
Rectangle 10ft x 6ft / 300cm x190cm |
8ft x 4ft / 260cm x 150cm |
90cm |
Rectangle 12ft x 8ft / 360cm x 250cm |
10ft x 6ft / 320cm x 210cm |
100cm |
Rectangle 15ft x 10ft / 460cm x 310cm |
13ft x 8ft / 420cm x 270cm |
110cm |
Rectangle 17ft x 12ft / 520cm x 370cm |
15ft x 10ft / 480cm x 330cm |
120cm |
Round 10ft / 300cm |
8ft / 260cm |
100cm |
Round 14ft / 430cm |
12ft / 390cm |
110cm |

DON'T FANCY GETTING YOUR HANDS DIRTY?
You have options! You can use any landscape gardener for this easy project. just send them a link to this page and ask for a quote.
Alternatively, our expert in-house team can install your North Inground Trampoline for you! London and home counties only. Please fill in the enquiry form below and we'll get in touch!
How long will it take to install?
Our trampolines have been designed to install yourself, how long it takes depends on the size of trampoline you choose and whether you dig by hand or hire an excavator. Digging by hand we'd say allow a weekend to complete the job, if you hire an excavator you'll easily do it in a day.
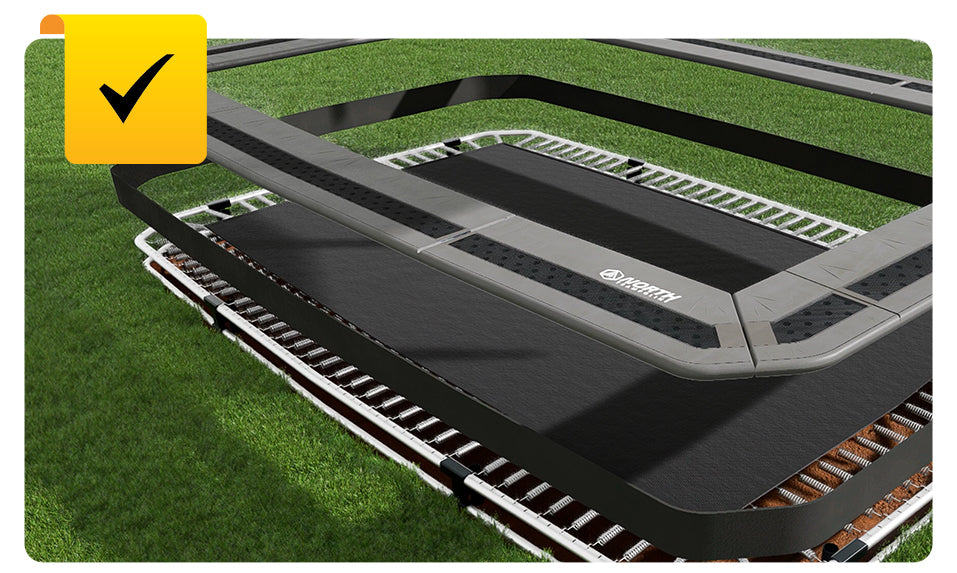
Do I need to build a retaining wall?
No! Our in-ground trampoline kit has a retaining wall built in, making it even easier to install at home. The retaining wall easily screws onto the frame into pre-drilled holes.
Do I need to hire an excavator?
This depends on the size of trampoline you choose and how energetic you're feeling!
We'd recommend digging the 10ft and 10ft x 6ft sizes by hand as it's actually easier to get the bowl shape you need with a spade than an excavator. But for the largest sizes hiring an excavator will definitely make less work for you.
How much soil do I need to excavate and how do I dispose of it?
The amount of soil you need to excavate will vary depending on which size trampoline you are installing.
For the smaller size trampolines you will fill a 6-yard skip (10ft x 6ft, 10ft) for the medium size trampolines you will fill an 8-yard skip (12ft x 8ft) and for the larger trampolines (14ft, 15ft x 10ft and 17ft x 12ft) you may need to arrange for a grab lorry to come and collect the soil.
If you are able to use the soil in your garden for raised beds or levelling ground etc. then you will save the cost of a skip or grab lorry!
Do I need to add drainage?
In most cases, a simple soak away as described in the instructions should be sufficient to ensure your trampoline pit drains well. For some gardens that have a high density of clay you may need to consider alternative drainage options such as the ones outlined in our blog.
How much room should I leave around my trampoline?
If you do not have a net on your trampoline then you should leave at least 1.5m around the perimeter of the trampoline to avoid the user bouncing off the trampoline into a potential hazard such as a tree or fence.
You should also make sure that there are no hard surfaces within this area such as a stone pathway.
How do I look after my Inground Trampoline?
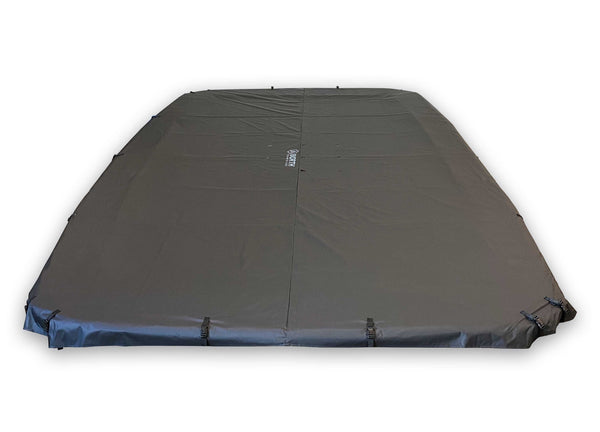
Fortunately, the North Inground Trampolines are relatively maintenance free! It always helps to prolong the life of your trampoline pads and jump mat if you purchase a cover.
Likewise keeping your trampoline clean of general garden debris such as fallen leaves, twigs and mud will help maintain all elements of the trampoline. We recommend that you check all parts regularly and replace any worn out parts as soon as you notice them.